Setting Up a Detection Lab
Last Updated on September 12, 2024 by aghanim

Table Of Contents
Update
I was able to upgrade my CPU and motherboard to i9 9900k. 9900k have a passmark above 18000.

After upgrading my hardware I destroyed all my ranges and used the config below for Elastic EDR, GOAD and Kali and deployed it again. This time, it all worked without any problems as opposed to earlier. Because of my weak CPU the VM’s was not able to catch up with Ansible and was timing out with different errors.
This time though, it all works well.

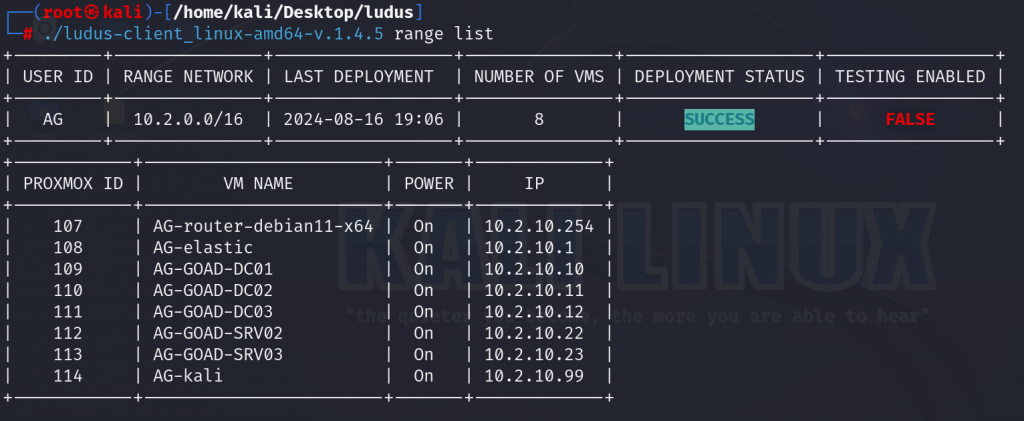
We can also verify that all the GOAD VM’s have Elastic agents running healthy.

The next goal is to complete GOAD while trying to monitor Elastic in order to understand which attack vector gets caught and which do not. Also will work on my malware development and evading detection in preperation for CRTO 2.
Intro
When doing an engagement sometimes one would need to test a payload or an attack vector before deploying it. Watching how an operating system logs different events or how security solutions detect certain payloads can be valuable information for a red teamer/penetration tester.
An example that happened was gained credentials to MSSQL, and the MSSQL user had rights to enable xp_cmdshell. Of course, running commands through xp_cmdshell would always be detected in a mature envrionment, but what about other indirect exectuion such as relaying? Instead of testing in a production environment and possibly blow your cover, one could test it in a detection lab.
So the the plan is as follow:
- Using Ludus to set up GOAD (Game of Active Directory (GOAD) | Ludus)
- GOAD (https://github.com/Orange-Cyberdefense/GOAD) is a great way to test different attack vectors against AD.
- Using Ludus to setup ELK and Fleet. (Elastic Security | Ludus)
Setting up ludus
Setting up ludus is explained in detail on their website: https://ludus.cloud. In my lab setup I’ve used debian 12 with 32 GB ram, 250 GB on an NVME ssd and 4 cores. My i3 9100F is not strong enough to run GOAD, Elastic and Kali. So until I’ve upgraded my hardware I will deploy elastic, windows vm, linux vm and a kali.
Remember to make sure your CPU is higher than 6000 passmark. Preferably 10K, maybe more.
Now onto the building of templates.
Keep in mind building the first templates can take hours, depending on your internet speed and hardware.

In order to interact with the VM’s either using SSH, RDP or KasmVNC you need to setup WireGuard.
$env:LUDUS_API_KEY='JD._7Gx2T5kTUSD%uTWZ*lFi=Os6MpFR^OrG+yT94Xt'
.\ludus-client.exe user wireguard --user JD --url https://127.0.0.1:8081 | Tee-Object -Variable luduswg; $luduswg  | Set-Content -Encoding ASCII ludus.conf
When the setup is finished you will have a ludus.conf file that you import to WireGuard and connect.
Setting up ranges
After you’ve finished setting up ludus, you are now ready to deploy ranges. There are multiple environments you can set up. A complete list can be found here: 🏗️ Environment Guides | Ludus.
For this lab I’ve setup GOAD and Elastic Security.
Follow the guide for setting up GOAD. After that we can deploy elastic and agents on the GOAD vms. Use the config below.
- Add the roles below
ludus ansible roles add badsectorlabs.ludus_elastic_container
ludus ansible roles add badsectorlabs.ludus_elastic_agent
2. Add badsectorlabs.ludus_elastic_agent role to the hosts you want to deploy agent to. See the config below. Afterwards run ludus range config set -f config.yml and deploy using ludus range deploy.
The below config wil deploy GOAD, Elastic EDR and a Kali. All the VMs in GOAD will have an Elastic Agent. You can add roles by adding these lines
roles:
      - badsectorlabs.ludus_elastic_agent
ludus:
- vm_name: "{{ range_id }}-elastic"
hostname: "{{ range_id }}-elastic"
template: debian-12-x64-server-template
vlan: 10
ip_last_octet: 1
ram_gb: 8
cpus: 4
linux: true
testing:
snapshot: false
block_internet: false
roles:
- badsectorlabs.ludus_elastic_container
role_vars:
ludus_elastic_password: "thisisapassword"
- vm_name: "{{ range_id }}-GOAD-DC01"
hostname: "{{ range_id }}-DC01"
template: win2019-server-x64-template
vlan: 10
ip_last_octet: 10
ram_gb: 4
cpus: 2
windows:
sysprep: true
roles:
- badsectorlabs.ludus_elastic_agent
- vm_name: "{{ range_id }}-GOAD-DC02"
hostname: "{{ range_id }}-DC02"
template: win2019-server-x64-template
vlan: 10
ip_last_octet: 11
ram_gb: 4
cpus: 2
windows:
sysprep: true
roles:
- badsectorlabs.ludus_elastic_agent
- vm_name: "{{ range_id }}-GOAD-DC03"
hostname: "{{ range_id }}-DC03"
template: win2016-server-x64-template
vlan: 10
ip_last_octet: 12
ram_gb: 4
cpus: 2
windows:
sysprep: true
roles:
- badsectorlabs.ludus_elastic_agent
- vm_name: "{{ range_id }}-GOAD-SRV02"
hostname: "{{ range_id }}-SRV02"
template: win2019-server-x64-template
vlan: 10
ip_last_octet: 22
ram_gb: 4
cpus: 2
windows:
sysprep: true
roles:
- badsectorlabs.ludus_elastic_agent
- vm_name: "{{ range_id }}-GOAD-SRV03"
hostname: "{{ range_id }}-SRV03"
template: win2019-server-x64-template
vlan: 10
ip_last_octet: 23
ram_gb: 4
cpus: 2
windows:
sysprep: true
roles:
- badsectorlabs.ludus_elastic_agent
- vm_name: "{{ range_id }}-kali"
hostname: "{{ range_id }}-kali"
template: kali-x64-desktop-template
vlan: 10
ip_last_octet: 99
ram_gb: 4
cpus: 2
linux: true
testing:
snapshot: false
block_internet: false
The config below will deploy Elastic, Windows 11 host, a Debian host and Kali.
ludus:
  - vm_name: "{{ range_id }}-elastic"
    hostname: "{{ range_id }}-elastic"
    template: debian-12-x64-server-template
    vlan: 20
    ip_last_octet: 1
    ram_gb: 8
    cpus: 4
    linux: true
    testing:
      snapshot: false
      block_internet: false
    roles:
      - badsectorlabs.ludus_elastic_container
    role_vars:
      ludus_elastic_password: "thisisapassword"

  - vm_name: "{{ range_id }}-debian"
    hostname: "{{ range_id }}-debian"
    template: debian-12-x64-server-template
    vlan: 20
    ip_last_octet: 20
    ram_gb: 4
    cpus: 2
    linux: true
    testing:
      snapshot: false
      block_internet: false
    roles:
      - badsectorlabs.ludus_elastic_agent

  - vm_name: "{{ range_id }}-win11-22h2-enterprise-x64-1"
    hostname: "{{ range_id }}-WIN11-22H2-1"
    template: win11-22h2-x64-enterprise-template
    vlan: 10
    ip_last_octet: 21
    ram_gb: 8
    cpus: 4
    windows:
      install_additional_tools: false
    roles:
      - badsectorlabs.ludus_elastic_agent

  - vm_name: "{{ range_id }}-kali"
    hostname: "{{ range_id }}-kali"
    template: kali-x64-desktop-template
    vlan: 99
    ip_last_octet: 1
    ram_gb: 8
    cpus: 4
    linux: true
    testing:
      snapshot: false
      block_internet: false
After deployment is finished it should look like this.

The default credentials to access to different VM’s is:
Default Machine Credentials
- Kali
kali:kali(OS)kali:password(KasmVNC – port 8444)
- Windows
localuser:password(local Administrator)LUDUS\domainuser:passwordLUDUS\domainadmin:password(Domain Admin)
- Debian based boxes
debian:debian
- Others
localuser:password
Testing the lab
After everything is setup we can verify that Elastic have a healthy agent on the Windows 11 host and debian host.

As you can see that looks good.
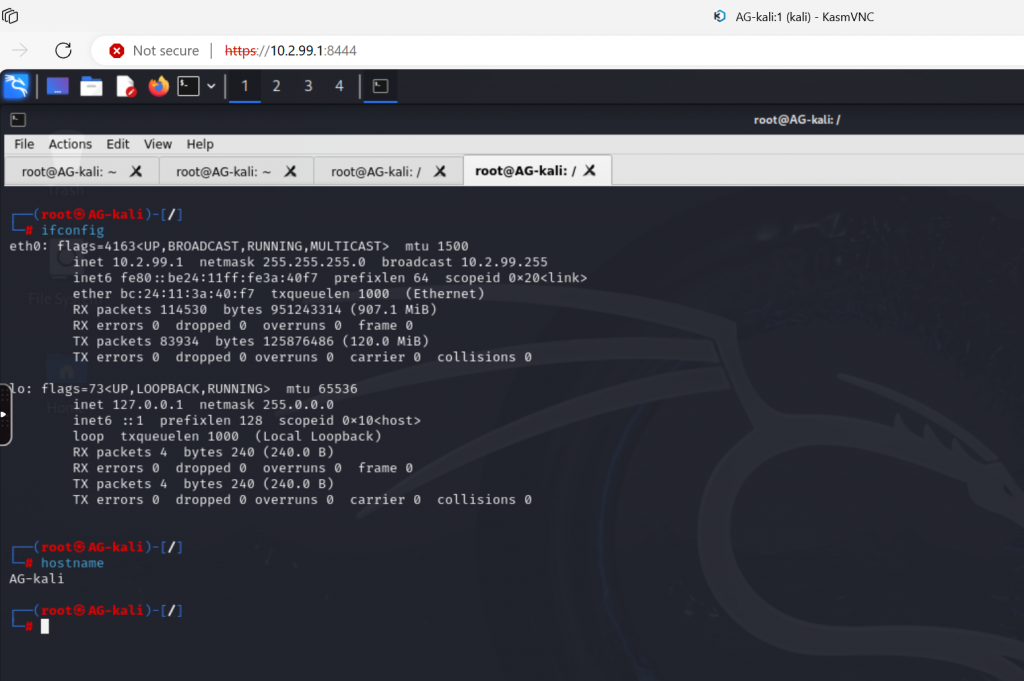
Accessing Kali is done using a browser with KasmVNC.

And we can RDP to the Windows machine. To get RDP config ludus range rdp.

Test Elastic Defender
Now the fun can begin. Lets test defender by dropping a payload to the Windows machine. Elastic EDR have been set to prevent mode.
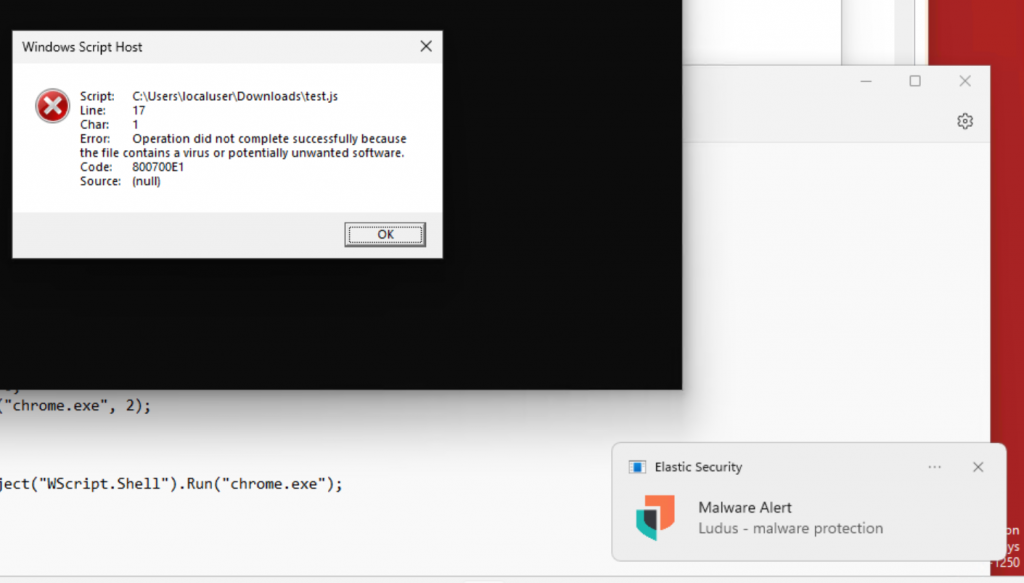
To make it a bit more challenging av dropped a js file on disk, that will fetch a payload called chrome.exe. Chrome.exe is an APC injection that will fetch msf.bin payload and execute the task asynchronously. In this test I’ve done it simple and just used metasploit as my c2 framework.

After executing the payload we get a pop-up saying that there is a malware alert. Now we can go to Elastic to find out what happened.

Looking in Elastic we can see that it flagged our payload “chrome.exe” as malicous.

This above picutre tells us that a process with the name “chrome”, with parent process wscript.exe, was executed by localuser on the machine and its categorized as critical.
It wont exactly tell which part of the payload that got caught. So that part you have to dig for yourself using for example ThreatCheck.
Troubleshooting
Unreachable
When deploying a range you might experience an error saying that a host is unreachable. The fix that worked for me is to log into Proxmox and manually reset the host and try deploying again
Add trusts between domain
This error occurd multiple times while running provisionning.sh.
To fix this I logged into the faulty host(s) and manually removed the DNS server ending with .254.
Then removing trust between the DC1 and DC2. In order to do that you have to have an enterprise admin account, so just create one manually.


