THM – Network Services – NFS – Part 6
Last Updated on January 25, 2022 by aghanim

Table Of Contents
Understanding NFS
What is NFS?
NFS stands for Network File System and allows a system to share directories and files with others over a network. By using NFS, users and programs can access files on remote systems almost as if they were local files. It does this by mounting all, or portion of a file system on a server.
How does NFS work?
The client will request to mount a directory from a remote host on a local directory just the same way it can mount a physical device. The mount service will then act to connect to the relevant mount daemon using RPC.
The server checks if the user has permissions to mount whatever directory has been requested. It will then return a file handle which uniquely identifies each file and directory that is on the server.
If someone wants to access a file using NFS, an RPC call is placed to the NFSD (NFS Daemon) on the server. This call takes parameters such as:
- The file handle
- The name of the file to be accessed
- The users, user ID
- The users group ID
This is what controls user permissions, I.E read and write of files.
What runs NFS?
Using the NFS protocol, you can transfer files between computers running Windows and other non-windows operating systems, such as linux, MacOS or UNIX.
A computer running Windows Server can act as an NFS file server for other non-windows client computers. Likewise, NFS allows a Windows-based computer running Windows server to access files stored on a non-windows NFS server.
Enumerating NFS
What is enumeration?
Enumeration is defined as “a process which establishes an active connection to the target hosts to discover potential attack vectors in the system and the same can be used for further exploitation of the system.” It is a critical phase when considering how to enumerate and exploit a remote machine – as the information you will use to inform your attacks will come from this stage.
Requirements
In order to do a more advanced enumeration of the NFS servers and shares – we’re going to need a few tools. First tool which is key to interacting with any NFS share from local machine: nfs-common.
NFS-Common
It is important to have this package installed on any machine that uses NFS, either client or server. It includes programs such as: lockd, statd, showmount, nfsstat, hssd, idmapd and mount.nfs.
Showmount and mount.nfs are the most useful when it comes to extracting information from the NFS share.
Mounting NFS shares
Your client’s system needs a directory where all the content shared by the host server in the export folder can be accessed. You can create this folder anywhere on the system. Once you’ve created this mount point, you can use the “mount” command to connect the NFS share to the mount point of your machine like so:
sudo mount –t nfs IP:share /tmp/mount -nolock| Tag | Function |
| sudo | Run as root |
| mount | Execute the mount command |
| -t nfs | Type of device to mount, the specifying that its NFS |
| IP:share | The IP address of the NFS server, and the name of the share we wish to mount |
| -nolock | Specifies not to use NLM locking. |
Which port contains the services we’re looking to enumerate? (run nmap scans and find out) 2049
Use
/usr/sbin/showmount -e [IP] to list the NFS shares, what is the name of the visible shares?

Mount the share to local machine!
Use mkdir /tmp/mount to create a directory on your machine to mount the share to. This is a /tmp dir so it will be removed on restart.
Use then the mount command we broke down earlier to mount the NFS share to your local machine. What is the name of the folder inside?

Which of these folders could contain keys that would give us remote access to the server? .ssh

Which keys are useful to us? Id_rsa
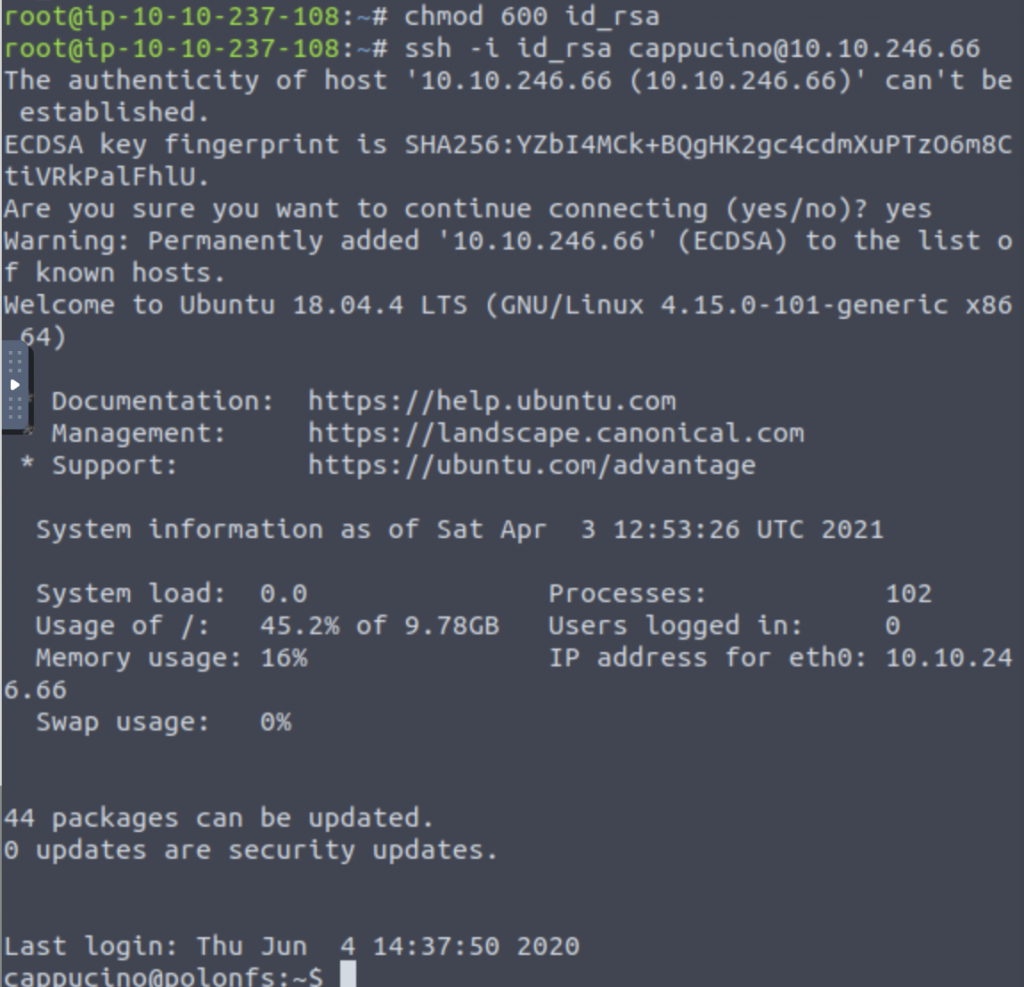
Copy this file to a different location on your local machine, change permissions to 600 using chmod 600 [file].
Can we log into the machine using ths command? Yes
ssh –i <key-file> <username>@<ip>

Exploiting NFS
We are not done until we have escalated privileges on our users. Cappucino have low privileges.
What is root_squash?
By default, on NFS shares- Root Squashing is enabled, and prevents anyone connection to the NFS share from having root access to the NFS volume. Remote root users are assigned a user “nfsnobody” when connected, which has the least local privileges. If this is turned of, it can allow creation of SUID bit files, allowing a remote user root access to the connected system.
SUID
What are files with the SUID bit set? This means that the file or files can be run with the permissions of the file(s) owner/group. In this case, as the super-user. We can leverage this to get a shell wiith these privileges.
Method
We’re able to upload files to the NFS share and control the permissions of these files. We can set permissions of whatever we upload, in this case a bash shell executable. We can then log in through SSH and execute this executable to gain a root shell!
The Executable
Due to compatibility reasons, we’ll use a standard Ubuntu Server 18.04 bash executable, the same as the servers – as we know from our initial nmap scan. Download here.
Mapped Out Pathway
Step by step of the actions we’re taking.
NFS Access ->
Gain Low Privilege Shell ->
Upload Bash Executable to the NFS share ->
Set SUID Permissions Through NFS Due To Misconfigured Root Squash ->
Login through SSH ->
Execute SUID Bit Bash Executable ->
ROOT ACCESS!!
Let’s do this!
First change dir to the mount point on your machine, where the NFS share should be mounted and the into users’ home dir.
Download the bash exec and cp to the NFS share. The bash must be owned by root. Set this using
sudo chown root bashNow we’re going to add the SUID bit permission to the bash executable we just copied to the share using “sudo chmod +{permission} bash”
What letter do we use to set the SUID bit using chmod? The S bit. Chmod +s bash
What does the permission set look like? Make sure it ends with –sr-x .

SSH into the machine as the user. Execute the bash script using “./bash -p”. The –p persist the permissions, so that it can run as root with SUID – as otherwise bash will sometimes drop the permissions.

What is the FLAG?


